GitHub actions are currently in beta and I was one of the lucky folks to get beta access. For various reasons I've decided to switch the entire build process of my blog to GitHub actions - let's talk about the why and how to build and deploy Gatsby sites with actions.
Why tho?
In case you're just interested in the actual guide you can skip this section - but I'd like to explain why overhauling my build process - and this post - were never planned and why they were still mandatory.
There hasn't been a new post for more than month now. But not because I didn't write any new posts - in fact I even released some new posts - they just never saw the light of the world. What?!
Unlike many Gatsby sites I'm not hosted on Netlify, GitHub Pages or any other hosting option described in the official docs. My blog and all associated tools (commenting system, newsletter, etc.) are hosted on Uberspace. I really like them, due to their great support, a great pricing model which may can be adopted to your budget and the fact that I can access the server with SSH and can do a lot of stuff by myself. There's no fancy interface in terms of controlling your server, most things are done on your console - and I love it.
When I switched to Gatsby some work was required in terms of being able to rebuild my blog automatically whenever I publish a new post. This work included a webhook which triggered a simple shell script which rebuild and deployed my site everytime it was called. The shell script responsible for building and deploying the site was pretty simple:
#!/bin/bash

set -o errexit

cd ~/blog
rm -rf .cache

if [ "$1" == "fully" ]; then
  rm -rf node_modules
  git pull
  ~/.yarn/bin/yarn install --production=true --pure-lockfile
fi

~/bin/gatsby build
rm -rf ~/blog_backup
cp -R <path>/html ~/blog_backup
rsync -avu --delete ~/blog/public/ ~/html
Sometimes (mostly when adding new features) I needed to fully rebuild the blog, including getting the new source files from Git and installing new dependencies. Since this took a pretty long time it was optional and could be triggered via the optional fully parameter when executing the script.
This script was part of a chain of scripts which were executed whenever the webhook was called. The webhook itself called a script which piped the output of script above into a file which gets send me a mail whenever it's done. This way I could easily check if everything worked whenever a rebuild was triggered.
It's no fancy solution with live console outputs and things like that - but it work...ed.
The problem
One week after my post about tmux I wanted to release a new post. Most of the time it took around ten minutes after I hit the "Publish" button that the webhook is done and I get the mail which tells me that everything worked out well and my blog has been updated with the latest post.
Not this time.
After nearly an hour and still no mail I sshd into my server and checked what happened. The output of the last build was:
[<user>@<server> blog]$ ~/bin/gatsby build
success open and validate gatsby-configs - 1.622 s
success load plugins - 22.156 s
success onPreInit - 0.018 s
success delete html and css files from previous builds - 0.261 s
success initialize cache - 0.020 s
success copy gatsby files - 0.575 s
success onPreBootstrap - 0.098 s
success source and transform nodes - 0.861 s
success building schema - 1.085 s
success createPages - 0.284 s
success createPagesStatefully - 0.146 s
success onPreExtractQueries - 0.012 s
success update schema - 0.037 s
success extract queries from components - 0.432 s
success write out requires - 0.007 s
success write out redirect data - 0.003 s
success Build manifest and related icons - 0.921 s
success onPostBootstrap - 1.478 s
⠀
info bootstrap finished - 92.619 s
⠀
success run static queries - 0.036 s — 3/3 101.33 queries/second
⠼ Building production JavaScript and CSS bundles
KilledAfter some research I found out that Uberpsace kills processes which take more than 1.5 GB memory. Additional researched revealed that my build process takes up to 1.7 GB of memory at this point - which was the reason for it to get killed.
I contacted the Uberspace support and they suggested to use the --max-old-space-size=1024 flag to prevent Node from taking too much memory - but sadly that didn't work out. I get the point of a hoster being unable to provide an unending source of memory - but that was indeed a major issue; I couldn't change anything on my blog at this point.
I had to rethink my entire build process. I looked up different options like AWS, GitHub pages or even building locally and deploying via a container - but all of them had some downsides I wasn't comfortable with.
At some point I thought of using GitHub actions for building and deploying my blog to Uberspace. This would provide 2000 minutes of build time per month with up to 7 GB of RAM memory - that should definitely do the job.
After some work it was finally done: my blog is now built (and tested) on GitHub via actions and finally deployed to my Uberspace which means I can now return to writing content again. Hooray!
GitHub action
My GitHub action consists of a multi-step job which does everything from checkout out the repository to deploying the built site via Docker and rsnyc.
Let's take a look at the workflow (located in .github/workflows/workflow.yml):
name: Update blog

on: [push, repository_dispatch]

jobs:
  update:
    runs-on: ubuntu-latest
    steps:
      - uses: actions/checkout@v1

      - name: Set Node.js
        uses: actions/setup-node@master
        with:
          node-version: 10.x

      - name: Install dependencies
        run: yarn install --prod --pure-lockfile

      - name: Lint
        run: yarn run lint

      - name: Build
        run: yarn run build
        env:
          GHOST_API_URL: "https://ghost.nehalist.io"
          GHOST_CONTENT_API_KEY: ${{ secrets.ghost_content_api_key }}
          GATSBY_ENV: "prod"
          GATSBY_CARRAWAY_URL: "https://carraway.nehalist.io"
          GATSBY_COMMENTO_URL: "http://comments.nehalist.io"
          GA_TRACKING_ID: "UA-40873708-1"

      - name: Deploy
        run: docker-compose run deploy
        env:
          DEPLOY_KEY: ${{ secrets.deploy_key }}
The steps are fairly simple:
- check out the repository
- setup node at version
10.x - install dependencies via
yarn - lint all files
- build the site
- deploy it via a custom container
The on keyword specifies whenever our action is triggered - in this case it's triggered on push and on repository_dispatch.
repository_dispatch may not be obvious at first glance; but it's for being able to call it externally (like an URL). This will become important for whenever a new post is published this webhook is called which will send a cURL request to GitHub and triggering the repository_dispatch event.
Important: Therepository_dispatchis only triggered on the themasterbranch (which is not mentioned in the docs). Acquiring this knowledge took a serious amount of my lifetime.
The more interesting things are happening within the Build and Deploy step. But before taking a closer look at how they work let's briefly talk about secrets within actions.
Secrets
Secrets, like your SSH key or your API key, should never be stored within your repository. Instead you can use repository secrets (located in your repository settings in "Secrets").
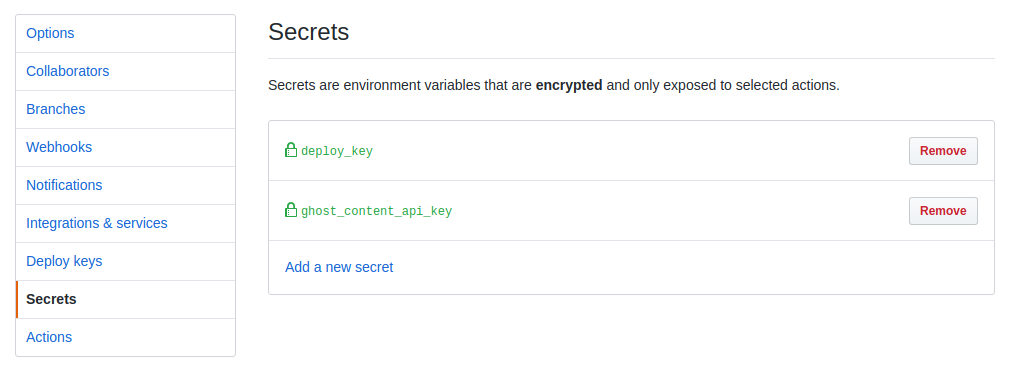
These secrets will not be printed within your console output of your actions and are not readable by users at all once added. This is especially important when it comes to deploying via rsync: we're going to use a SSH key to access the server, hence it would be really bad if someone gets access to this secret.
There's no excuse not use secrets for things like this; even if your site is within a private repository where you're the only one to have access to like mine.
Building the site
Let's take a closer look at the building step:
      - name: Build
        run: yarn run build
        env:
          GHOST_API_URL: "https://ghost.nehalist.io"
          GHOST_CONTENT_API_KEY: ${{ secrets.ghost_content_api_key }}
          GATSBY_ENV: "prod"
          GATSBY_CARRAWAY_URL: "https://carraway.nehalist.io"
          GATSBY_COMMENTO_URL: "https://comments.nehalist.io"
          GA_TRACKING_ID: "UA-40873708-1"
My site uses a bunch of environment variables (via process.env.<variable>) - since I use different sources for prod and dev environment - which can easily be set via the env key within a workflow step.
To access secrets within env variables you can simply use ${{ secrets.<your-secret> }}.
Deploying the site
The more interesting part is how the site is deployed. Our step within our workflow is pretty simple:
      - name: Deploy
        run: docker-compose run deploy
        if: github.ref == 'refs/heads/master'
        env:
DEPLOY_KEY: ${{ secrets.deploy_key }}masterBut as you can see within the run key we're not just calling a simple command but use docker-compose to run our very own docker container to deploy. So let's break that down to see what's going on here!
You might want to get rid of the if clause and deploy different refs to different locations; but this would definitely gone beyond the scope of this post.Docker
The first thing we need to take a look at is our docker-compose.yml file:
version: '3'

services:
  deploy:
    image: "instrumentisto/rsync-ssh"
    volumes:
      - .:/home/site
    working_dir: /home/site
    environment:
      deploy_key: $DEPLOY_KEY
    command: sh scripts/deploy.sh
You can probably do all the docker things without docker-compose - but I'm used to it and basically always using docker with Docker Compose.The image we're going to use for our deployment is instrumentisto/rsync-ssh which provides a small container with rsync installed.
In case you don't know rsync: it basically just synchronizes files. In our case: it syncs the public directory from our built Gatsby site on GitHub to our very own server where the site will be hosted.
The volumes and working_dir are just where our site will be mounted within the container.
The more interesting part at this point are environment and command. The used environment variables come from GitHub itself where deploy_key is what we got from our workflow.yml. Before taking a look at the script called within command let's talk about SSH keys.
SSH Keys
As mentioned earlier we're going to make use of SSH keys for deployment.
What we're going to do is to generate an SSH key pair (consisting of private and public) key. The public key will be added to our server, while the private key will be used within our docker container for rsync. Since we never want to reveal the private key to someone we're going to use GitHub secrets for this.
Let's start with generating our keys:
ssh-keygen -t rsa -b 4096 -C "<your mail>"This will generate a public and private ssh key. Since these keys won't be used directly by you (and gets deleted after we're done) it might be useful to put them somewhere else than your default SSH directory to prevent messing up with your existing SSH keys.
If everything worked out you should have two files: id_rsa and id_rsa.pub (or whatever you've called them). id_rsa is your private key, id_rsa.pub is your public key. First let's add your the public key to our server;
Copy the content of your public key, id_rsa.pub, file (e.g. via xclip -sel clip id_rsa.pub) and add it to your servers authorized_keys file (which - in my case - is located in /home/$USER/.ssh).
Afterwards copy the content of your private key, id_rsa, to your GitHub secrets.
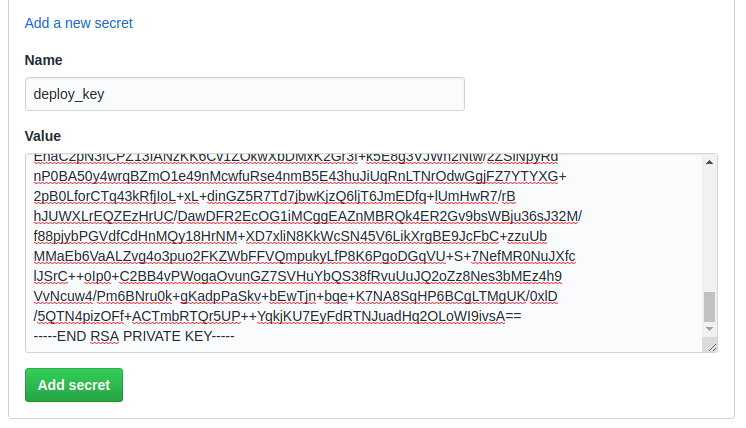
This key will be used within the Docker container to access your server.
Deploy script
The last file we need to take a look at is the deploy.sh file which is called by our Docker container within our workflow:
#!/bin/sh

# Instantly exists our script whenever an error occurs
set -e

# Pipe our environmental SSH key variable into a file
mkdir -p $HOME/.ssh
echo "${deploy_key}" > $HOME/.ssh/deploy_key
chmod 600 $HOME/.ssh/deploy_key # SSH keys need to be readonly

# Where to deploy our site on our server
target="~/html"

# The actual rsync
sh -c "rsync -azh -e 'ssh -i $HOME/.ssh/deploy_key -o StrictHostKeyChecking=no' public/* --rsync-path='mkdir -p ${target} && rsync' <user>@<server>:${target}"

# Remove our deploy_key again since it's no longer needed
rm $HOME/.ssh/deploy_key
The rsync command might seem a bit wild at first;
-azhis for using archive mode (-a), compress data during transfer (-z), preserve hard links (-h). See here for all arguments.-eis for setting up thesshcommand (to use ourdeploy_keyand to not do strict host key checking which would prompt us if we're going to trust the server).--rsync-pathis a neat little trick to create missing parent directories (see this post).
Now every time your GitHub action is executed your blog is directly deployed to your hoster. One last thing we're still missing is creating a webhook to trigger our action whenever a new post is published.
Triggering the action from outside
Triggering the action from outside is actually done by making use of the repository_dispatch event.
Don't forget: therepository_dispatchevent only works on themasterbranch!
The easiest way to trigger the action is by cURL:
curl -v -X POST -u "<username>:<access-token>" -H "Accept: application/vnd.github.everest-preview+json" -H "Content-Type: application/json" --data '{"event_type":"update"}' https://api.github.com/repos/<username>/<repo-name>/dispatches
If - and you definitely should - you're using two factor authentication you're going to need a personal access token with repo permissions.
Calling this command will trigger our action and our site to be rebuilt and deployed.
If you're using Ghost you can't just execute cURL commands after a post is published - but instead send a POST request to a user defined URL. In this case it's pretty simple to write a very small PHP script which executes the cURL command and triggers the action;
<?php

$key = $_GET['key'];

if ($key !== 'f4aOLlmN3') {
    exit('Nope.');
}

$curl = curl_init();
curl_setopt($curl, CURLOPT_URL, 'https://api.github.com/repos/<username>/<repository>/dispatches');
curl_setopt($curl, CURLOPT_RETURNTRANSFER, true);
curl_setopt($curl, CURLOPT_HTTPAUTH, CURLAUTH_BASIC);
curl_setopt($curl, CURLOPT_HTTPHEADER, [
    'Authorization: token <access-token>',
    'Accept: application/vnd.github.everest-preview+json',
    'User-Agent: <username>',
]);
curl_setopt($curl, CURLOPT_POST, true);
curl_setopt($curl, CURLOPT_POSTFIELDS, json_encode([
    'event_type' => 'update'
]));

$content = curl_exec($curl);
curl_close($curl);

// we could var_dump($content) here or whateverThe first thing you've probably noticed is the $key part; this is just to prevent that the hook can be triggered by anyone. It's very simple way of protecting your script. This script can only be called via webhook.php?key=f4aOLlmN3 - everything else will not trigger the action.
Everything else is basic PHP cURL insanity. The header includes your access token and sets the User-Agent to your username which is required by GitHub.
Now you can setup your CMS to send a request to this script (don't forget the key in the URL!) and your action will be triggered.
Conclusion
If everything is configured properly your site now gets build on GitHub and is deployed to your server afterwards. This is fancy and cool, isn't it?!
Since GitHub actions are still in beta things might change in the future - but the basic concept of this post should always work and should give way more room in terms of building capacities.