
If you're working with any web technology like Next.js or alike chances are that you're going to need a database, a mailing service or similar services at some point. Locally, you could install these natively on your system - via apt, brew or any other package manager - but the easier way would be to use Docker, which sometimes can be confusing - so let's talk about it.
For this guide, we're dealing exclusively with Docker Compose which is part of Docker - a single YAML file that lets you define all the services you need. You don't always need custom docker images - often times the existing ones are enough to drastically speed up your development.
Prerequisites
One thing that confused me when I first started with Docker Compose some years ago were some fields you may find in your services, especially volumes, ports and networks. Let's briefly talk about these fields:
Volumes
Volumes are an easy way to persist data for your containers. Since containers may be stopped it would be pretty annoying to lose all their data - just think of your development database would be empty every time you restart your computer. To solve this we can specify volumes that simply mount a container location to our host system - or, in other words, persist the actual data on your computer instead of your container.
Ports
Ports are a simple way to define how your services are reached. What we define in our docker-compose.yaml is a mapping between our host port to your container port. For example, if you start a simple mysql container it runs on port 3306 within our container. Through ports we can define that our local port (3306 in our example) should reach for our container service on port 3306.
Via ports we can even define custom IPs for our containers - but more on that a bit later.
Networks
While we don't need networks specifically for this guide, it's certainly not a bad thing to understand at least the basics of it - especially since some guides use custom networks for their containers.
By default, all our containers are assigned to a single (default) network which makes them reachable for all other containers. Just like volumes you could use custom networks for our containers. Imagine you have multiple applications with multiple databases within a single docker-compose.yaml - with networks you could simply run every single app and its corresponding database in a dedicated network.
Databases
One of the most common requirements for your applications would be some kind of database for data persistence. Docker makes it easy to quickly use whatever database engine (PostgreSQL, MySQL, MongoDB, you name it) you'd like to have. Let's look at an example with PostgreSQL:
version: '3'

services:
  db:
    image: postgres:13.3
    ports:
      - "5432:5432"
    # For data persistence if you want to keep your data even if your container goes down
    volumes:
      - db_data:/var/lib/postgresql/data/
    environment:
      POSTGRES_DB: app
      POSTGRES_USER: user
      POSTGRES_PASSWORD: password

  # Optional: Adminer (https://www.adminer.org/en/) a graphical user interface for your database
  adminer:
    image: adminer
    depends_on:
      - db
    ports:
      - "8080:8080"

 volumes:
   db_data:
docker-compose.yaml
Running docker-compose up -d here would bootstrap a simple PostgreSQL (in version 13.3) database in version 13.3 on port 5432.
latest for better traceability and to be less prone to errors.I like to keep credentials for local development containers as simple as possible; in this case the database is named app, the user is called user and the password is password. This way I never have to think about credentials a lot.
As mentioned in the beginning we use a volume called db_data that helps for persisting our data.
Usage
Using our database with this configuration is pretty simple:
- Host:
127.0.0.1 - User:
user - Password:
password - Database:
app - Port:
5432
If you're providing your database connection as an URL it's just:
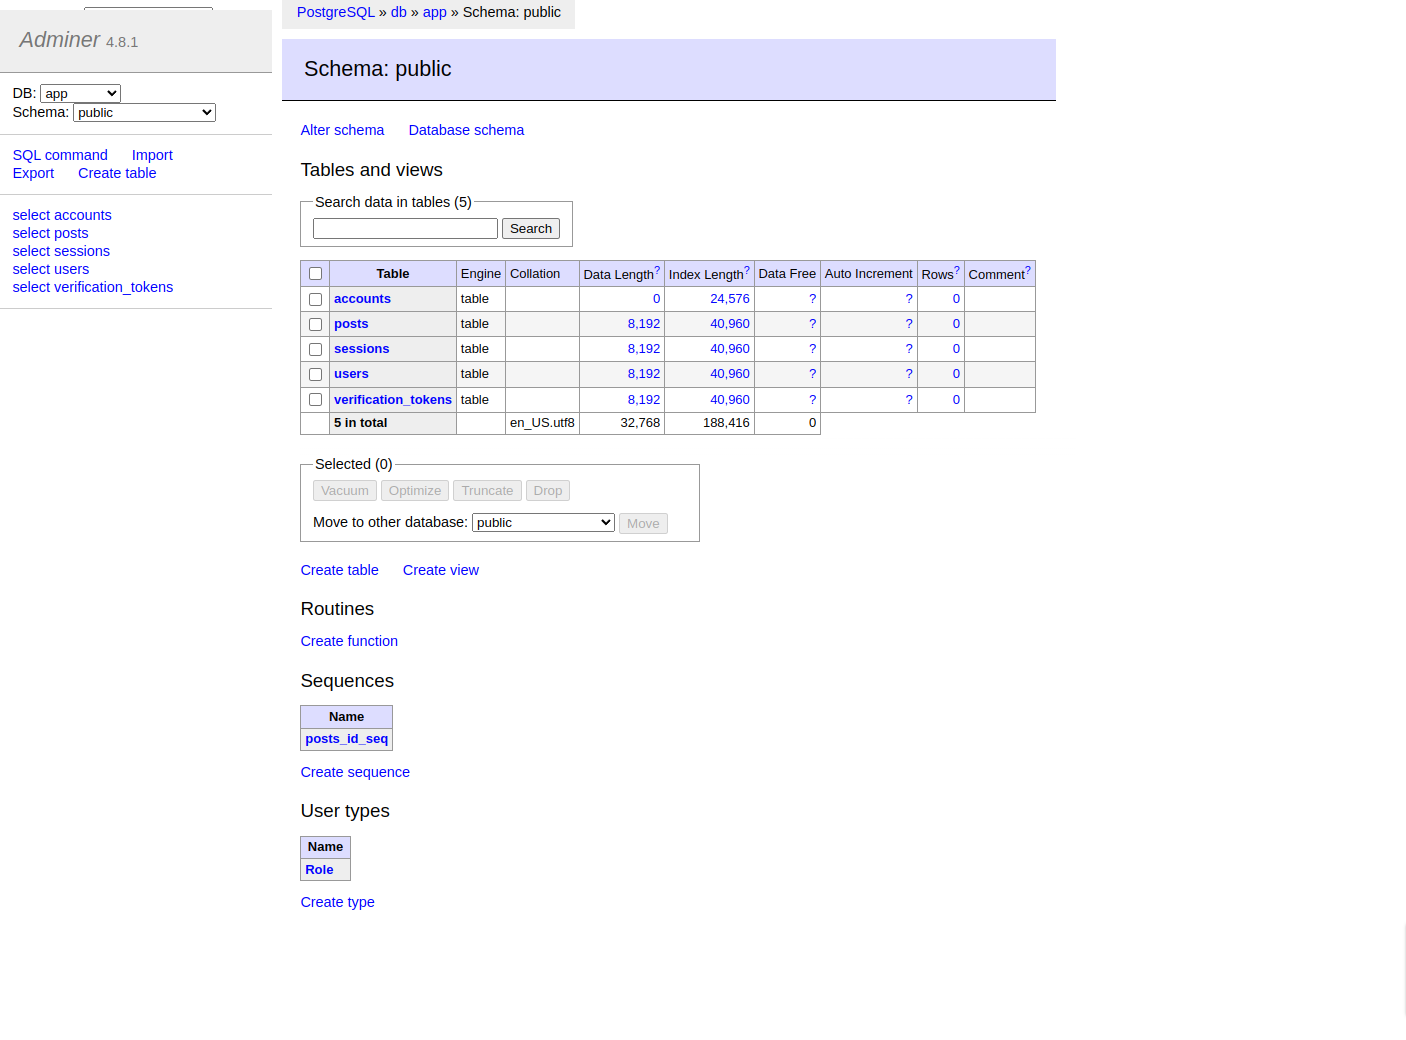
postgresql://user:password@127.0.0.1:5432/app?schema=publicIf you've gone with the Adminer container the GUI can be found at localhost:8080 and can be used with the credentials above. Don't forget to set your database system to the database of your container and the server to db when you're logging in to Adminer.
Mails
Sending mails locally is always painful. How to log in via mail (e.g. via the next-auth mail provider) if you don't have an SMTP server? Glady there's MailHog. MailHog provides an SMTP server we can use to send mails and a simple UI to receive our mails. Docker Compose makes it a breeze to setup:
version: '3'

services:
  mailhog:
    image: mailhog/mailhog
    ports:
      - "1025:1025" # SMTP
      - "8025:8025" # UI
docker-compose.yaml
That's all we need to handle mails locally.
Usage
Our local mail credentials:
- Driver:
smtp - Host:
127.0.0.1 - Port:
1025 - No user, password, or encryption
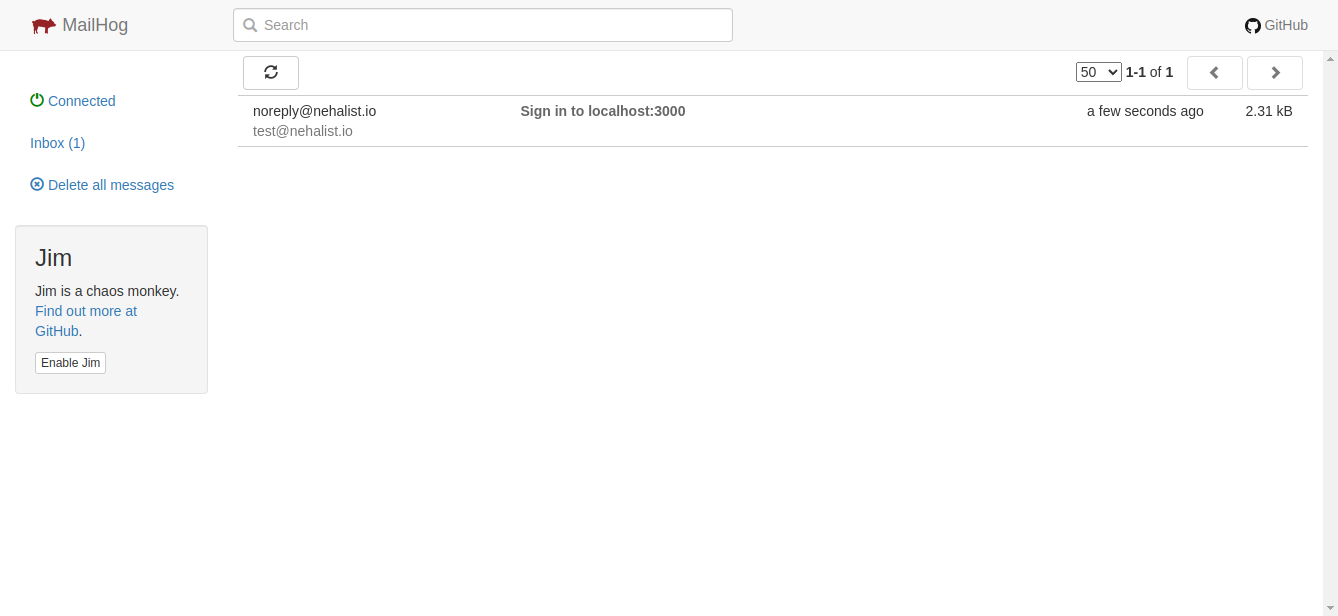
Every time a mail gets sent via this SMTP server we can open our browser at localhost:8025 to see our local mail traffic. Logging in locally via email has never been easier.
Node
You might want to containerize your entire Node application. This way others could bootstrap your entire application without even having to install Node:
version: '3'

services:
  node:
    image: node:20-alpine
    working_dir: /app
    volumes:
      - ./:/app
    # in case you're using a database:
    # depends_on:
    #  - db
    ports:
      - "3000:3000"
    entrypoint: ["npm", "run", "dev"]
docker-compose.yaml
This container will mount the current directory to the container and execute npm run dev whenever it boots.
Usage
After running docker-compose up -d our application will run at localhost:3000.
If you're using a database or any other container it's important to change some credentials in order for our containers to reach its container friends. For example, if you're using the database container mentioned above you need to change the host from 127.0.0.1 to db (or however you've named your service in your Docker Compose file):
postgresql://user:password@db:5432/app?schema=publicThe same goes for our Mailhog service: the host now becomes mailhog instead of 127.0.0.1.
Docker is smart enough to resolve these hosts internally and we can boot our entire application with a single docker-compose up -d command without ever having to install anything on our host system (except Docker of course).
Conclusion
As seen in this guide using Docker - or Docker Compose to be more specific - is really simple and potentially speeds up your development by a lot. All it takes are a few lines of YAML and you've got yourself a fully functional database, an SMTP server, and more running.
If there's any container or setup related to Docker you'd like to know more about please just let me know in the comments or write me an email.
Additional tips
While there are tons of more things you can do with Docker the configurations shown here are the ones I use the most for local development. Here are some more personal tips to improve your Docker setup even more:
Dozzle
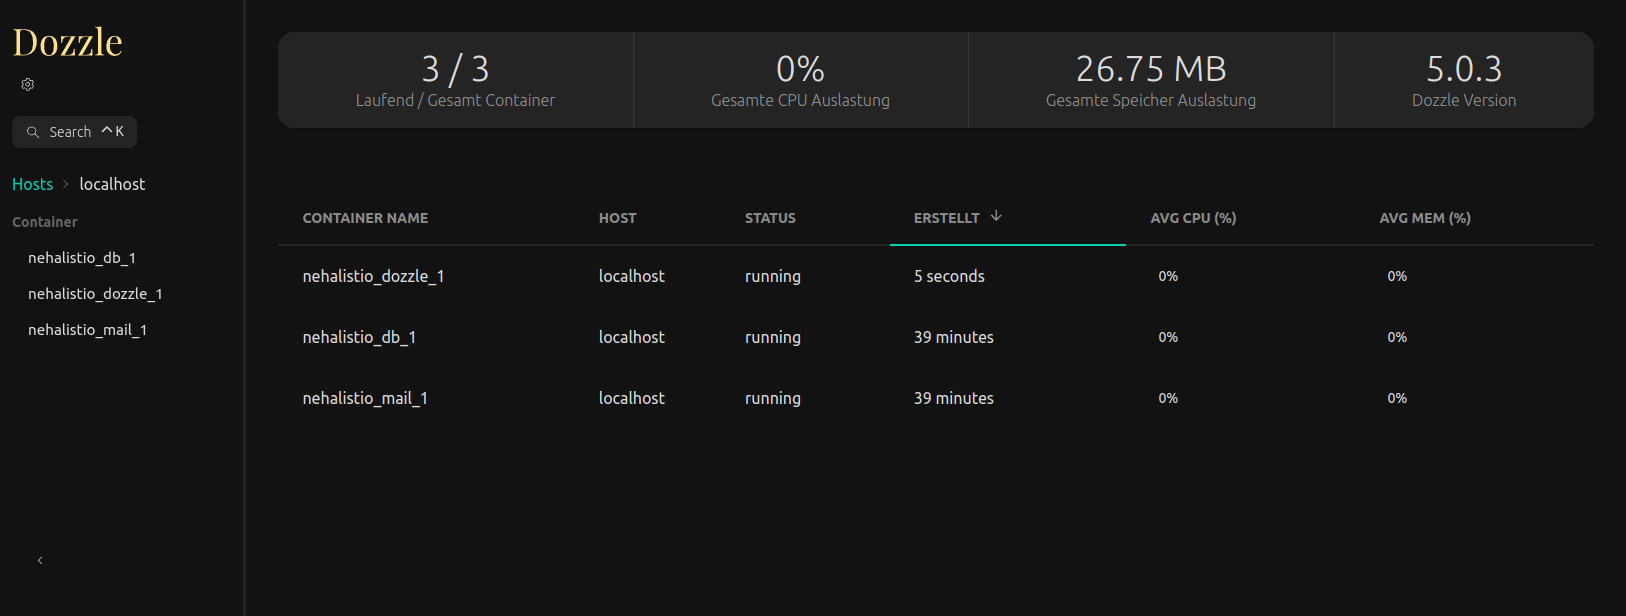
If you run a lot of containers it's easy to get lost. Fortunately, there's this really handy service named Dozzle that shows you all containers, their usage and lets you even see the logs of each container via a practical web UI.
The service for our docker-compose.yaml is as follows:
version: '3'

services:
  dozzle:
    image: amir20/dozzle:latest
    volumes:
      - /var/run/docker.sock:/var/run/docker.sock
    ports:
      - "9999:8080"
    environment:
      # Optional: filter just containers for the currenct project name
      - DOZZLE_FILTER=name=nehalist*
Without the DOZZLE_FILTER env variable all our containers are listed. The UI with this configuration can be found at localhost:9999.
Handling multiple projects with custom container IPs
If you're working on multiple projects you're likely going to encounter some port collisions sooner or later. Having multiple databases running at 5432 on your local machine won't work - but having to stop all containers every time we switch to a new project can't be the solution either.
A possible solution would be to use custom IPs for every project. IP addresses can simply be specified as part of the ports definition, e.g:
ports:
- "127.100.0.1:5432:5432"
This will cause our service no longer to run at localhost:5432 but 127.100.0.1:5432 instead.
My personal recommendation is to choose some IPs within the 127 address range (from 127.0.0.1 to 127.255.255.255) and just use these addresses for our containers.
0.0.0.0.Binding IPs on MacOS
If you're on MacOS and decide to go for custom IP ranges you'll quickly encounter the following error:
docker: Error response from daemon: Ports are not available: listen tcp 127.100.0.1:5432: bind: can't assign requested address.In order for custom IPs to work on MacOS we need to run the following command for our desired IP (127.100.0.1 in this case):
sudo ifconfig lo0 alias 127.100.0.1 netmask 0xff000000
Now we should be able to start our container without any error - and on a custom IP.
Port collisions
In case you still encounter port collisions an easy way to find running containers on certain ports is the following command:
docker ps | grep <port>Using env files
By default Docker loads env files - so if you're using an .env file in your project you can simply use it within your docker-compose.yaml.
DB_PORT=5432.env
version: '3'

services:
  db:
    image: postgres:13.3
    ports:
      - "${DB_PORT}:5432"
    volumes:
      - db_data:/var/lib/postgresql/data/
    environment:
      POSTGRES_DB: app
      POSTGRES_USER: user
      POSTGRES_PASSWORD: password
docker-compose.yaml
You can even specify custom env files by using the env_file property within your services.